Showing posts with label nutrocker. Show all posts

Monday, April 2, 2012

1/35 Nutrocker/Nutcracker


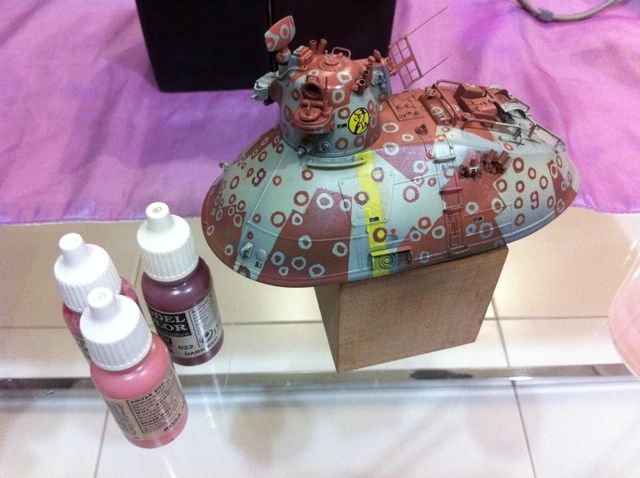
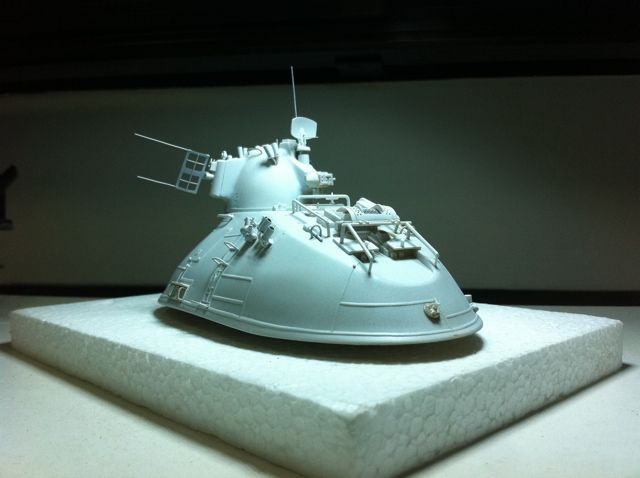
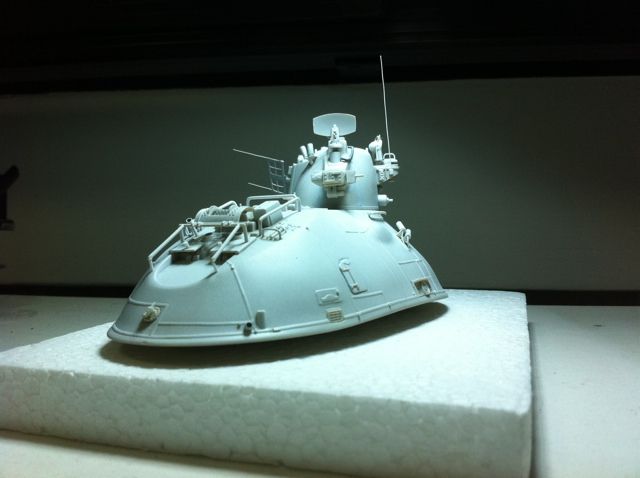
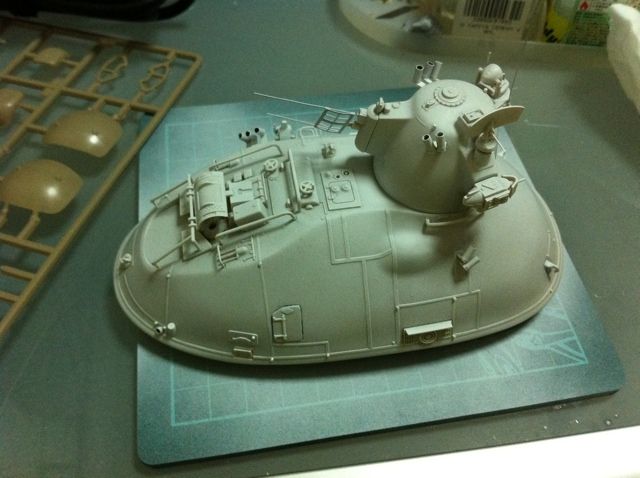
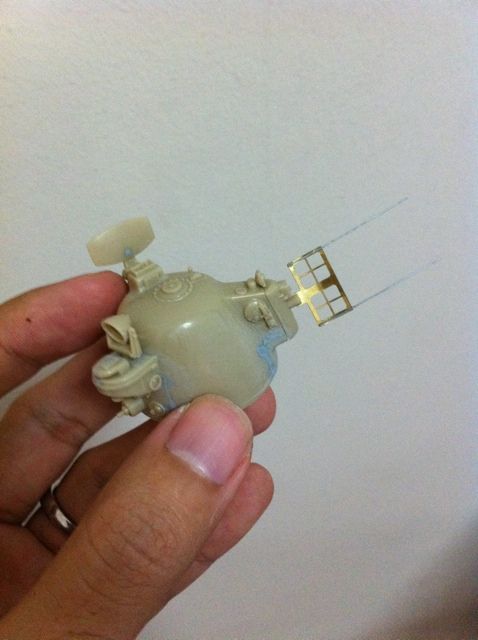
I finally caved in and bought myself a 1/35 Nutrocker / nutcracker.
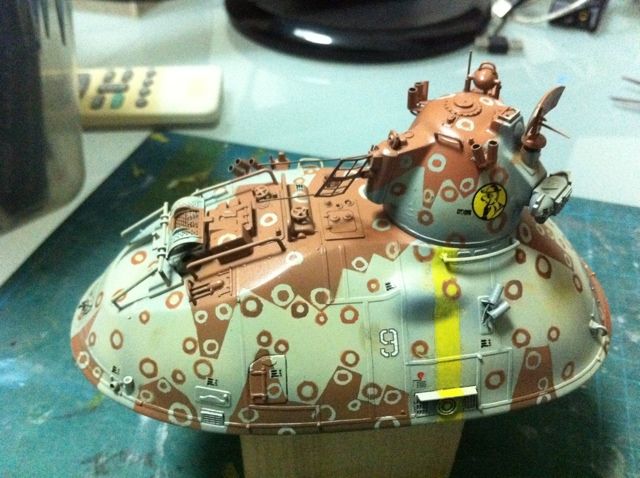
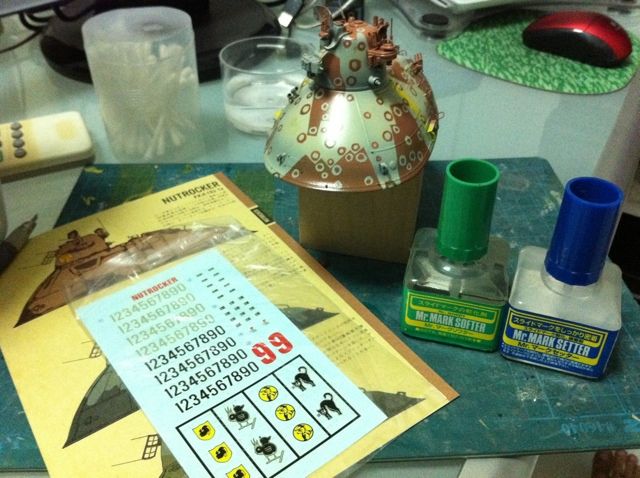
Checked the decals and camo card and boy there are lovely schemes to build!!!
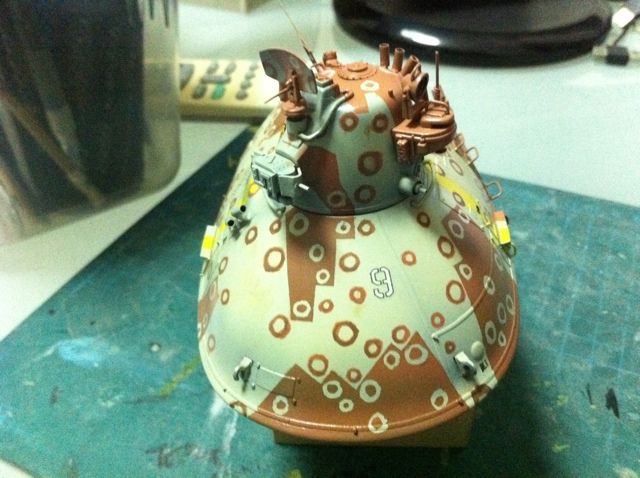
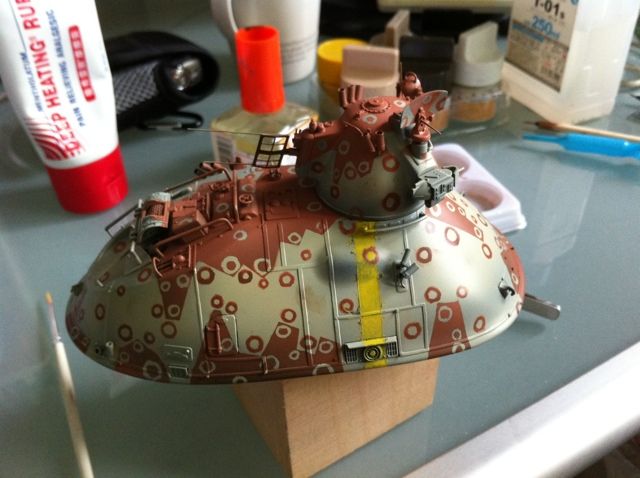
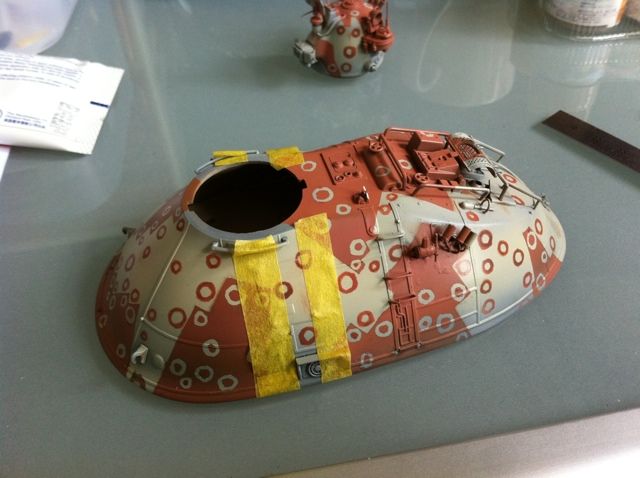
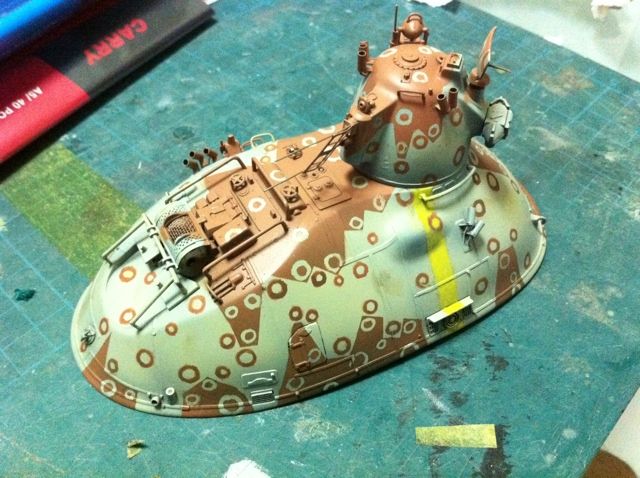
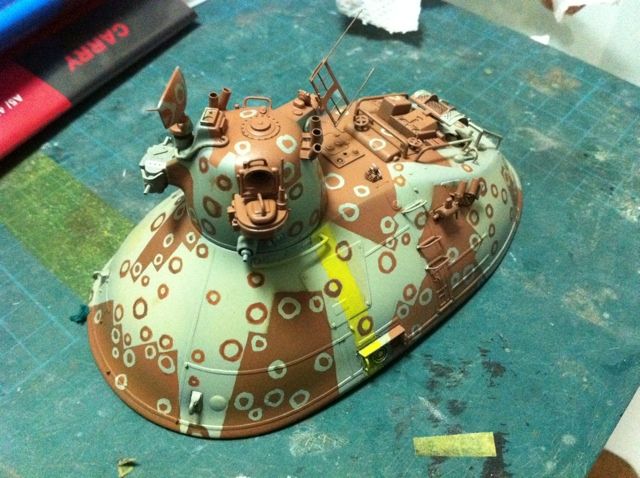
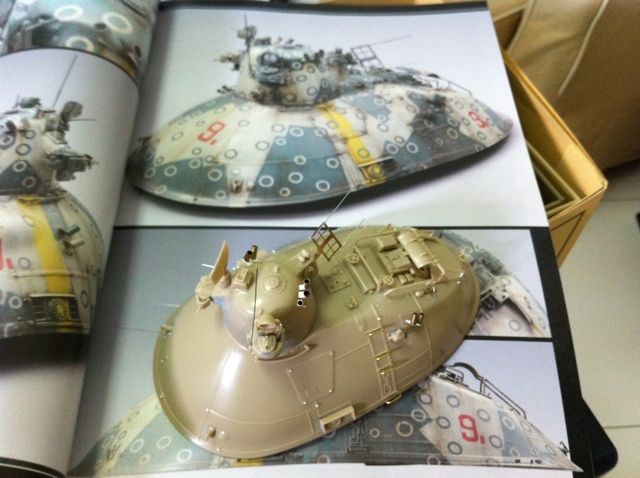
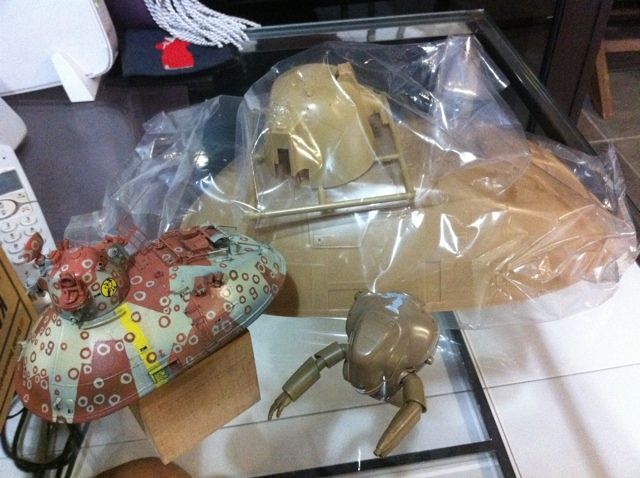
Can't find the squid rings done by max watanabe in the Mak in sf3d vol 2 though.
He must have custom printed those. Now I have a dilemma, should I build the same scheme as the 1/76 scale which will look nice together, or choose another scheme?
Decisions decisions...
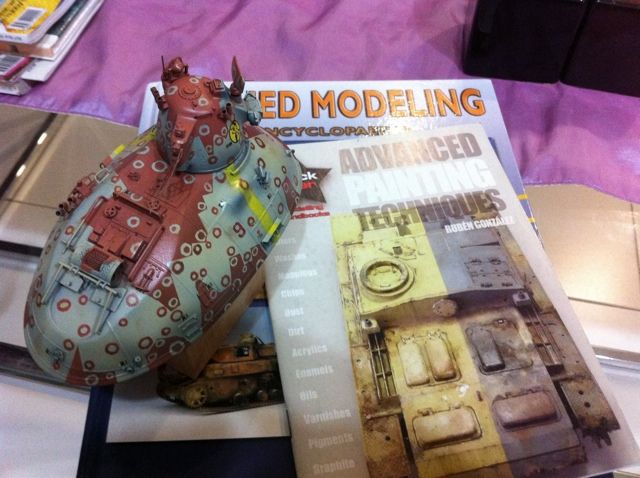
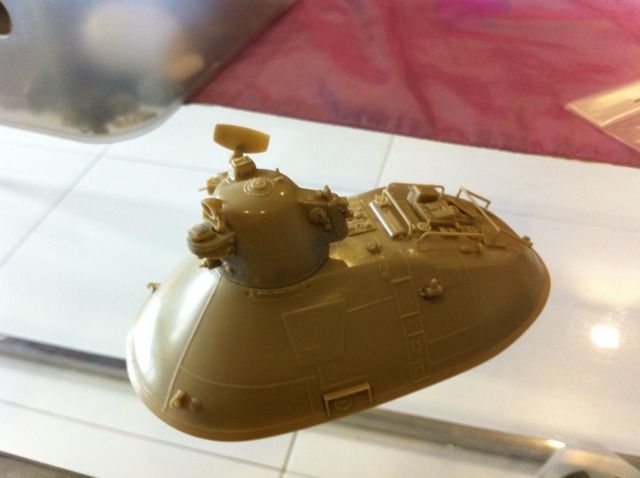
I should never have bought the book, now I fell in love with many of the camo schemes!

The magic of Mak!

Sunday, March 18, 2012

Nutrocker - weathering begins!

Was a bit sick last few days so not much done. Back on the project, I used vallejo red to fill in the number 9 on the decals. Painted on nice and I should have used the yellow to paint the stripes instead of the lacquer. Lesson learnt.

Now the weathering, I will use what I learnt from Applied Modelling - armor and Advanced Painting Techniques to weather this tank.

Thursday, March 15, 2012

Decal time!!!


Now comes my favorite part, decals!
Small container of water, mr mark setter and mr mark softener ready.
Before that I sprayed two thin layers of clear coat gloss to make the surface smooth and shiny so that when the decals go up they will not sliver. Tonights a bit cool so I dried the gloss immediately after spraying with a hairdryer to prevent frosting.
2.5 hrs later I am done! I chose the number 9 from the neuspotter decal set as it matches the one from the book and also more proportionate to the size of the Nutrocker. Time for Elias next feed, ciao!

Sunday, March 11, 2012

Nutrocker circles and band painted, disaster and recovery

Hey guys sorry for the lack of updates, I took a short break for sleep ...
I finally took off all the masking sol and started hand painting the rings. My hand trembled due to lack of sleep.
Added complication was that the wire parts kept falling off due to my clumsiness.
I finished up the rings and touched up the errors here and there.
Finally I proceeded with the yellow band. I masked off the body and handpainted the yellow band , taking care if where the shadows.
However after removing the tape I realized the yellow had seeped under it and invaded the other colors! What a disaster! I nearly gave up.
Tonight, I took a tiny brush and slowly touched up the flaws in each picture.
Think I am ready to gloss and decal...


Tuesday, March 6, 2012

Pink highlights and slow reveal


After completing my housework, I airbrushed another layer of pure monkey rose. Finally I did the lightest layer using mixture of monkey rose, yellow and a tiny bit of white. This is sprayed on the top facing surfaces.

With much fear I took off the masking tape. There were places where the tape did not cover or stick well to each other, resulting in over spray and blurred borders. I should have used te masking sol to cover all the tape, as well as using fresh tape.
It's ok I will remember this lesson.
Taking off the masking sol proved to be a challenge and it took scratching with my nails, tape and blu tack to get some of them off. The circles are too thick.
However I like the color which is modulated.

Will complete the taking off of masking sol and hopefully finish painting tomorrow

Monday, March 5, 2012

Pink and shading with complementary colors


I started work on the Nutrocker again at about 12 am, using Ma.k color monkey rose as the pink/red forth scheme. 

First pass is with the mixture of monkey rose mixed with olive green, the same gray I used at the beginning and a bit of black as the shadow color.
I am studying shading with complementary colors and used the green to cut down on the chroma of the monkey rose instead of just adding pure black or brown.

I also used my fingernail to press down the edges of the masking tape before spraying as some of them are starting to lift. This is cos I am reusing the masking tape. El cheapo...

After that I let it rest for a while tp dry and then proceeded with a pass of pure monkey rose color. I took care not to cover too much in one go, using multiple coats to layer on the color ...


I am getting sleepy and so took a break at 2:45am and Elias woke just in time for his milk. Fed him a bottle and typed up this post.

Time to sleep.

Thursday, March 1, 2012

Pink!


After the highlights are done it's time to paint the pink.
Instead of using the gaianotes monkey rose which meant that I have to do complicated masking, I decided to use vallejo line of acrylics to hand paint. Now I've bought these for ma.k figure painting, never thought will be using it on a tank.
I've placed an iPhone cover (argh my wife's broken Kate spate) to show how tiny this kit is.
Hope this pink will be successful!

Wednesday, February 29, 2012

More yellow on the nut


With baby Elias sleeping early, I quickly went back to painting the nut. Some of the wires fell off so I reattached them.
I masked off the top surface of the body and sprayed the highlights using a mixture of the yellow and white.
The fake shadows and highlights are quite obvious. The contrast will tone down when I do weathering.

Monday, February 27, 2012

Nutrocker wip : yellow


With the cool bluish gray done, I sprayed very thin coats of mr color 313 yellow which will be one of the two major colors of the squid scheme I will be doing. Took a while to get my airbrush groove back.

Notice that I left the shadow parts uncoated in the base color as the shadow effect. I kept referencing the photos I took earlier to see where the darker areas should be and avoid spraying them. Now this is quite experimental and I am not sure if this is alright. I keep thinking if I should use yellow plus a complementary color as the shadow or leave it as such.
What do you guys think?
It's not done yet as I will have to add yellow and white to spray the highlights on the top facing surfaces.
This is the book I have been reading and it was introduced to me by maxwinamp. Highly recommended!

Saturday, February 25, 2012

Nutrocker base coat


Finally started with a base coat of gray mr color 301.
Highly diluted and took a few passes to ensure that all the shadow areas are covered.
That's all for tonight..

Wednesday, February 22, 2012

Nutrocker primed and pls tell will to start painting!

Will I please get to the painting stage?
Final primed pictures with strong direct lighting so that I can study them when I do color modulation in the painting stage. The shadows and brighter areas will be emphasized using color.
Make sense?


Monday, February 20, 2012

Nutrocker final build step before paint

Final build step before paint, I took up Dainaka's challenge to put wires to the smoke grenade launchers.
Tried wire , hair and finally thin styrene which is able to stick...

It's quite difficult as the add ons are fragile and I broke off the wire ladders a couple of times.
Another part is this suspension part similar to the one used on the leg of the krote.

I rebuilt that part on the Nutrocker using styrene.

And here.

Pardon the blur image as I took them using my phone and they are tiny parts.
Finally I followed vayeate's lead in adding a wire to the turret where a pipe should be.
It's in black.

Saturday, February 11, 2012

Nutrocker and the case of the grill


Continued this build after getting very sick this week and now as my kids are asleep I finally sat down and did some work.
Using a drill bit and hobby knife, I opened up the engine cover by removing the plastic grill in situ and placed a fine wire mesh inside. The cover is firmly glued so I can't remove it. Not easy considering all the fragile parts I need to avoid breaking while cutting the cover! I did make a couple of parts fall off in the process but they are easy glued back.
Frankly when Francesco, whom I respect a lot mentioned to replace the cover, I thought he is trying to make my life difficult. But when Dainaka supported the idea, I though hey it might just be possible to do it as a challenge. Well 1.5 hrs later it's done and I am happy with the results.

Thanks guys for your support, and keep pushing me to do better!

As the doc in Back to the Future said: if you put your mind to it, you can accomplish anything.

Sunday, February 5, 2012

Nutrocker primed


Super slow progress due to each one in my family taking turns to get sick.
First was Ashley and now my wife. But thank God only minor food poisoning.
I ran out of the 2mm brass tubes for the smoke grenade launchers and had to go out and replenish them.
Finally primed everything tonight.
Next up, base coat!

Tuesday, January 24, 2012

Nutrocker camo chosen!

My friends over in the Mak forum suggested that I try out the squid camo scheme in the book, the one with many circles, which was in the background. initially I thought it was too tough but after much thought! I take it as a challenge to do it.
Ashley wanted it in pink too which I thought was ridiculous but then after seeing some tanks in pink, also from the pals in the Mak forum, it didn't seem crazy anymore.
Tried googling for 'pink squid' and got some funny pictures, none the least is the pink squid from Finding Nemo.
I took a photo of that squid while in the hospital with Elias as I thought he looked like it.

And so pink squid camo dedicated to my second kid, Elias, is a go!

Wait til he grows up and sees this... lol

Saturday, January 14, 2012

Nutrocker super detailed

Thanks guys for your well wishes! Elias is still a bit grumpy but better... Damn the apple auto correct, we did not overgraze him, but overfed him, he reached 5kg in two months instead of six!

I referenced the 1/35 kit and see what other details I can put in.
I added wires for the antenna on the turret, and brass wires (no 2 brass wires from the local daiso japanese value shop) for making the handles to climb up the nut. Also removed some plastic on the left and right side which are represented by wires on the 1/35 kit.
Added smoke grenade launchers using brass tubes from hobbymate bought earlier and added rivets using very thin evergreen styrene. There are actually rivets in the kit but are very shallow and almost invisible.

Love adding details to this kit.
What do you guys think?

Friday, January 13, 2012

Nutrocker detailed


With my kid being sick, i cant continue painting my falke as i need to setup the spray booth. So I decided to build.
 I am not a Nutrocker fan. It's design makes it fodder for rockets, not to mention lasers from the Safs.
Looking at all the entries in the Mak forum nutcracker build, as well as the Mak in sf3d vol 2 inspired me to dig out my half completed 1/76 Nutrocker  which is languishing in the box.
I had previously glued and puttied it.

This kit is old and while being quite 
detailed it has huge gaps which needed to be fixed with putty.

I had broken the plastic rails and fixed it with evergreen styrene.

I referenced the 1/35 kits pictures and added wires to the radar thingy. I also bent the brass portion a bit like the big kit.