Sunday, April 29, 2012
Super hot in Singapore
It's really hot last few days averaging 29deg at night..
Not much modeling work done except sanding down the air filter.
Nowadays when I do modeling, it's to enjoy the process and to 'get that model I saw in the book'.
My motivation has been encouragement from my fellow modellers and self actualization.
In the past I did work towards a competition and hope to win big, but seeing how many powerful modellers and their works I was greatly humbled at my amateur works. It became too stressful and not enjoyable anymore.
So, I just want to enjoy the hobby and get the kits to display at home!
What's your motivation in modeling?
Saturday, April 28, 2012
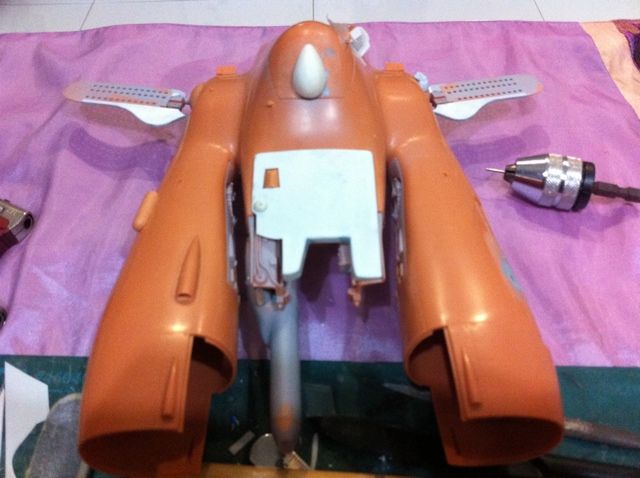
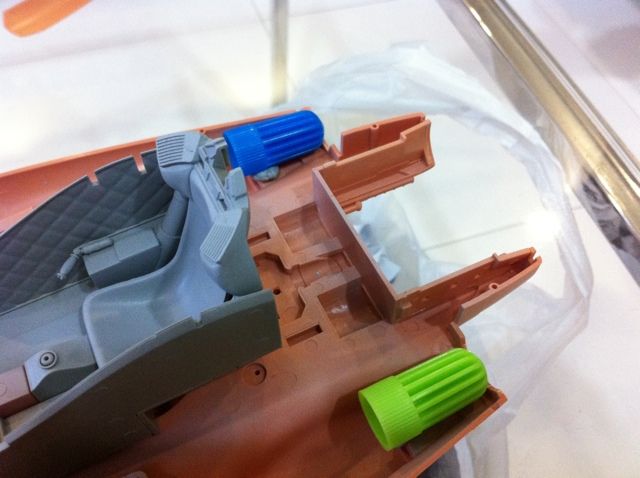
Falke 4 : air filter

Tuesday, April 24, 2012
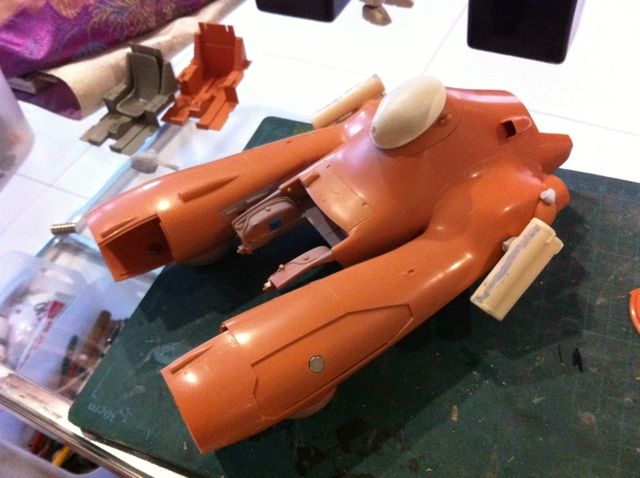
Falke 4 : minor update

Saturday, April 21, 2012
Falke 4 : Oogling the boom engine and some progress
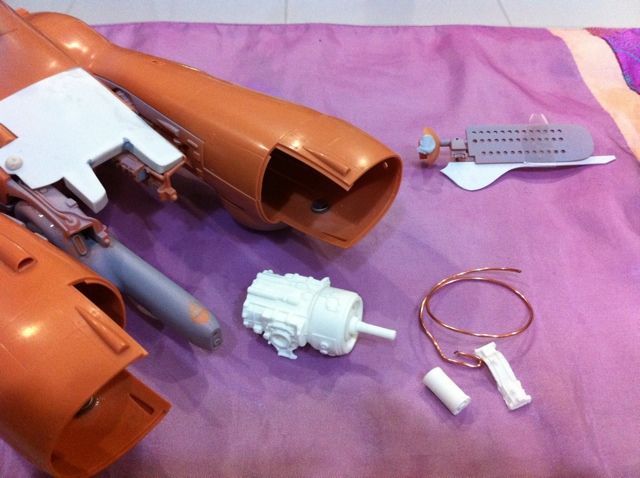
Oogling the boom engine made by futch and from the box, sold thru ihysc roboterkampf... It's really detailed and made of 3 parts and a piece of wire which replicates the pipes.
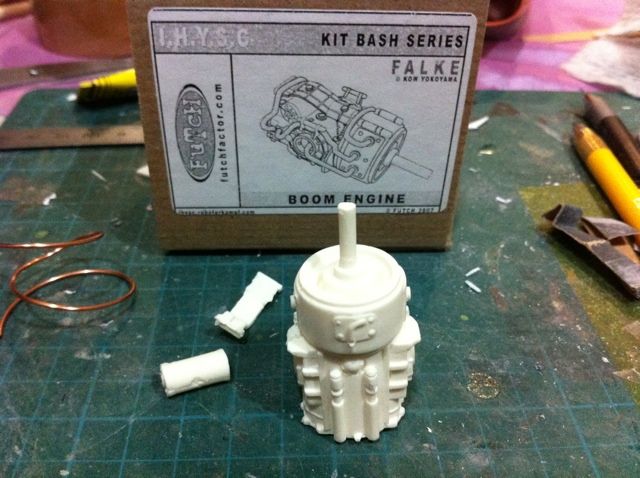
 I had initially thought I could scratch build it using pictures from the Mak books but after seeing this resin, there is no way I can get to this.
Also dropped the idea of rubber casting to make a duplicate for the other side cos it's too complex a shape.
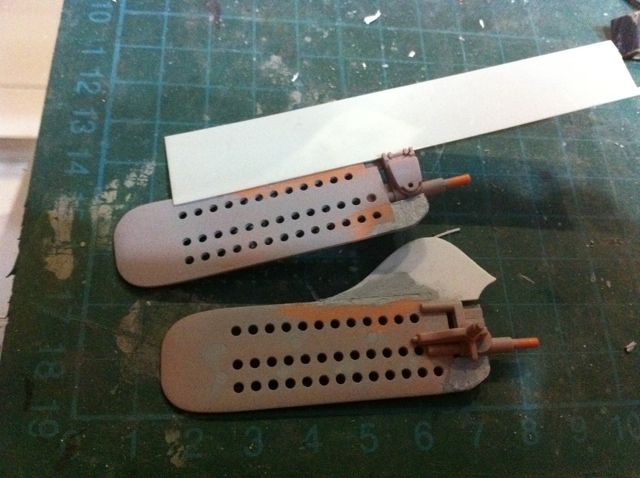
Going back to the build, I added plapate to the air brakes, putty up the gaps, and added another thinner layer to simulate the front bulge being slightly thicker and being bolted on.(see the one on the back)
I had initially thought I could scratch build it using pictures from the Mak books but after seeing this resin, there is no way I can get to this.
Also dropped the idea of rubber casting to make a duplicate for the other side cos it's too complex a shape.
Going back to the build, I added plapate to the air brakes, putty up the gaps, and added another thinner layer to simulate the front bulge being slightly thicker and being bolted on.(see the one on the back)
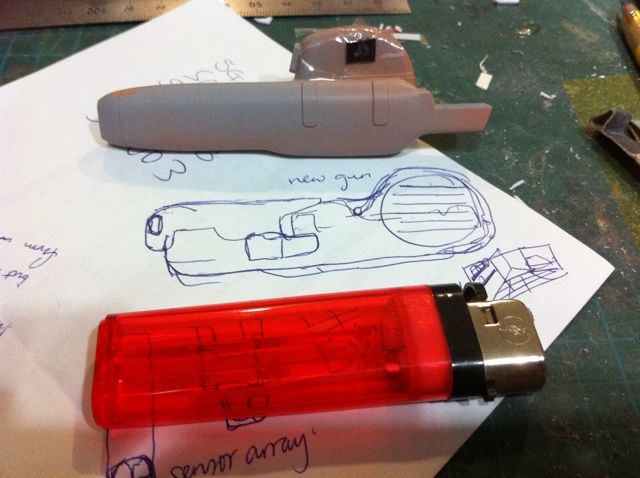
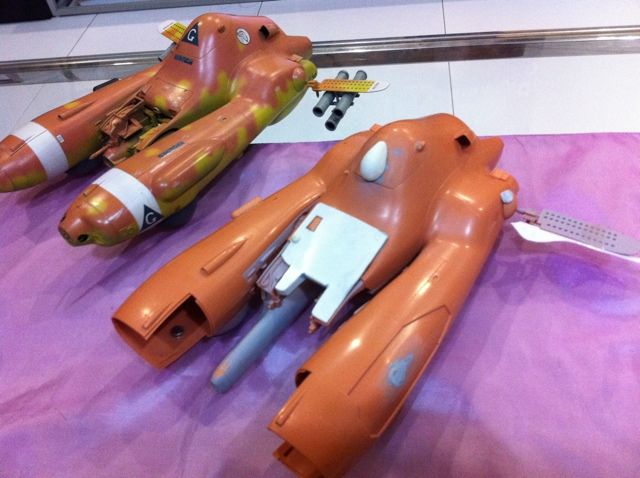
 In parallel, I am scratch building another main weapon based on Zuru jp's sketch of a Falke mounted on a tank. I sketched it out on a piece of paper and will build it based on a lighter. Note that I dun smoke, lighters are used for lighting candles on birthday cakes.
Thursday, April 19, 2012
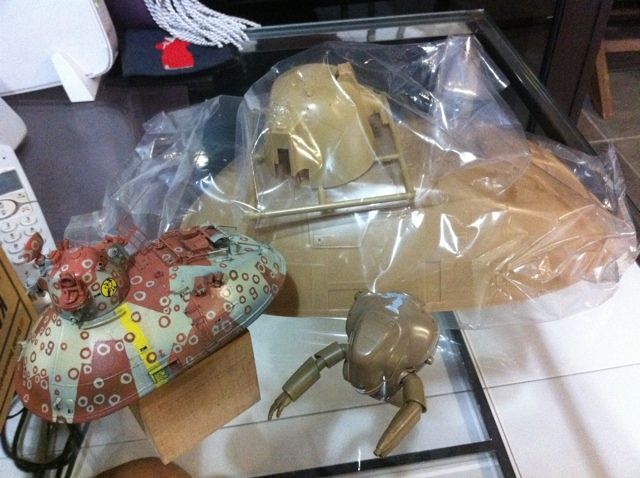
Falke 4 : Resin engines arrived!
Look at what came in today!
A kind member of the Mak forum gave me an original Falke engine resin made by futch who made and sold the resin Falke before the styrene version which we are building, came out!
It's beautiful!
Now I gotta figure put how to fix it inside ...
Thanks so much zerobxu!!!
So exciting !!
Wednesday, April 18, 2012
Sunday, April 15, 2012
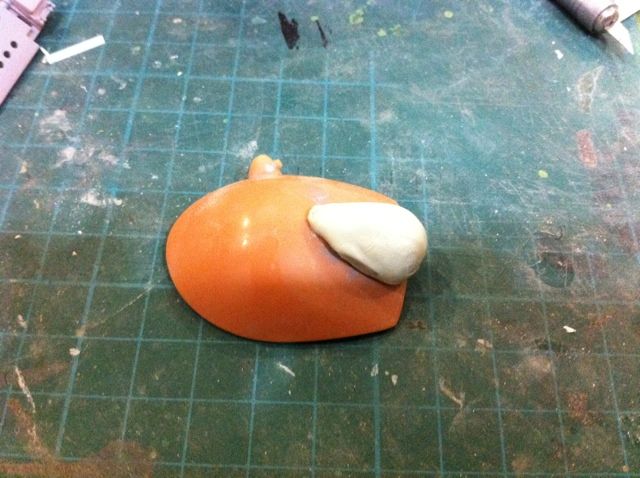
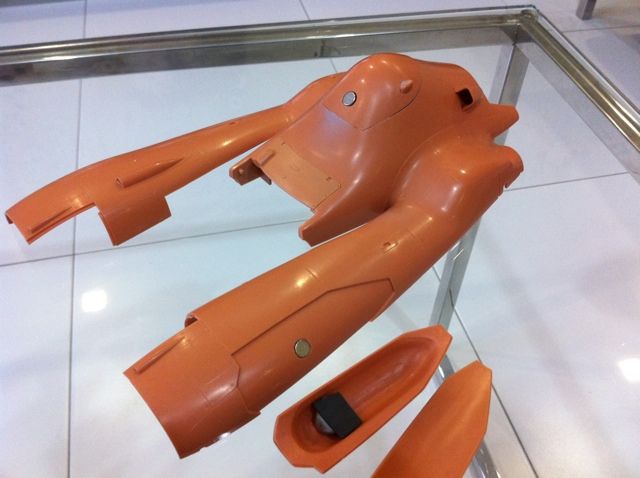
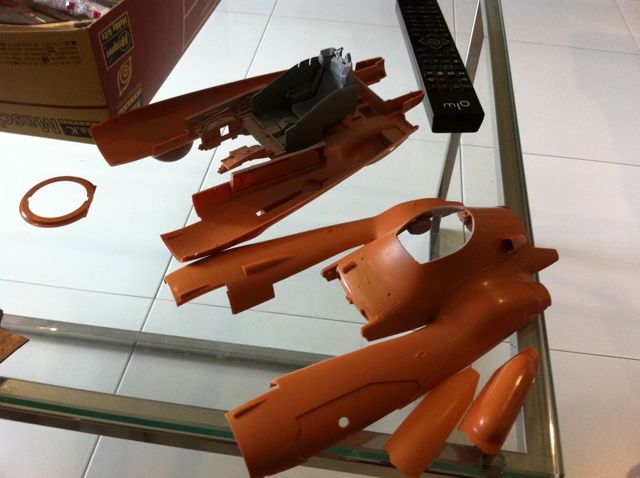
Falke 4 : putty time
Cut out the front armor and after much bending and filing, I came to this using no 2 as the template.
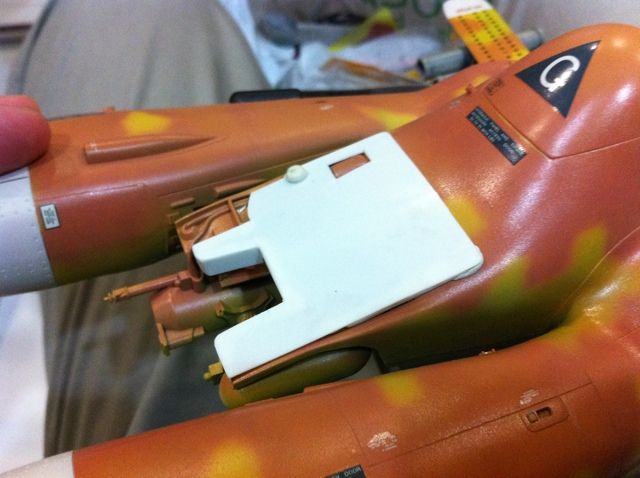
The underside shows how I did it, gluing plapate and then reinforcing with a part epoxy putty which is my favorite.
After everything dries, filing down to get the rounded edges.
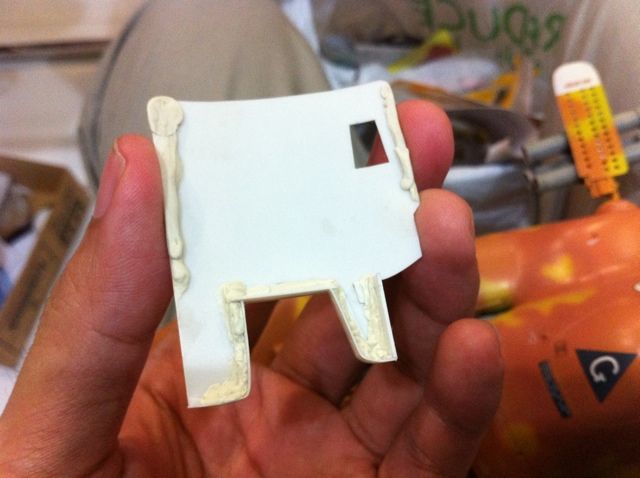
It's not exactly like the original kit version but it's close. Agar agar (which means roughy there) as we love to say in Singapore.
Made the sensor using putty. Should have placed a plastic sheet on the hatch before I shape it but ran out of the sheet. It's much bigger now as I will file it down to shape. Man is it hard to get it symmetrical!
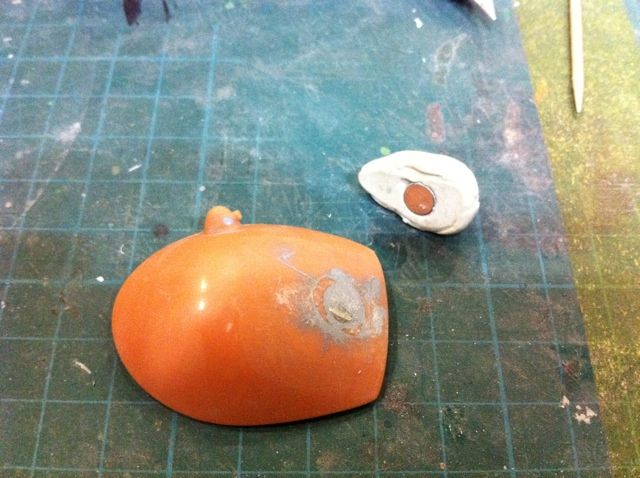
Embedded another magnet inside so it will attach onto the hatch.
Next up, an open kit review!
The underside shows how I did it, gluing plapate and then reinforcing with a part epoxy putty which is my favorite.
After everything dries, filing down to get the rounded edges.
It's not exactly like the original kit version but it's close. Agar agar (which means roughy there) as we love to say in Singapore.
Made the sensor using putty. Should have placed a plastic sheet on the hatch before I shape it but ran out of the sheet. It's much bigger now as I will file it down to shape. Man is it hard to get it symmetrical!
Embedded another magnet inside so it will attach onto the hatch.
Next up, an open kit review!
Thursday, April 12, 2012
Falke 4 - tiny update
Been very tired last two nights due to work and a sick Elias.
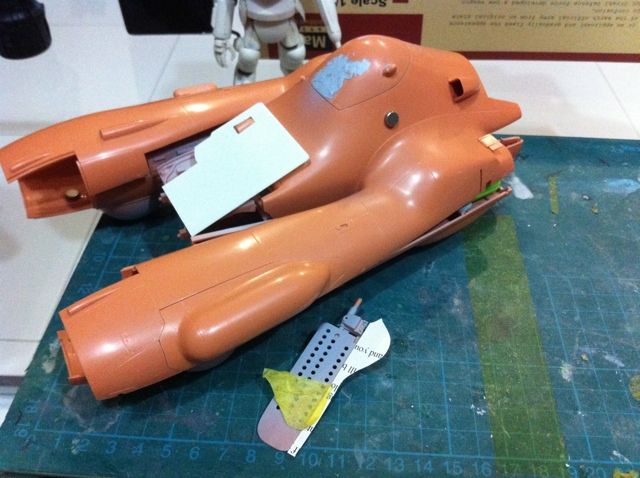
Finally managed to cut the front armor from styrene and finalise the shape of te air brakes.
Also puttied up the two exposed magnets and added more on the top interior so that I can hang the Falke if necessary.
Time for bed!
Monday, April 9, 2012
Falke 4: Griffon part 1

Tiny update. I started on the mods to get the Griffon configuration.
I used a piece of paper and using the images from the web, started shaping the front shield.
Once finalized, I will use this paper template to styrene.
Saturday, April 7, 2012
Falke 4 : magneto!
The magnets are so strong that I can place them on the inside of the fuselage and they will hold the magnets outside. I used 4 for holding the missile unit and 1 each for the ag shields for the Struzzo configuration.
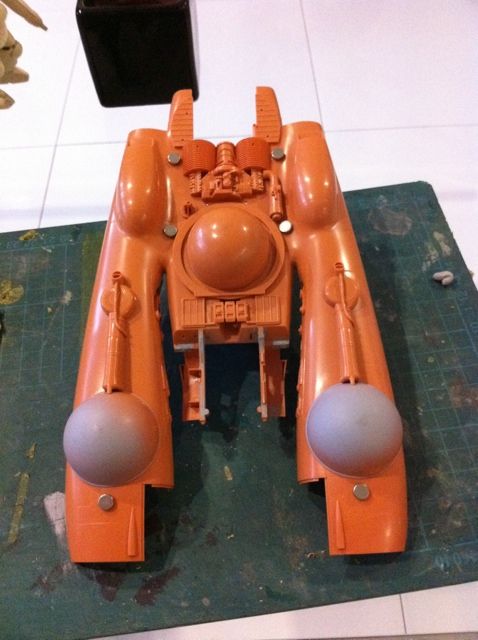
I used magnets outside to adjust the positions before using super glue and epoxy putty to secure them.
Playing now, here's an easy conversion to Zuru jp's Nightraven design using the snakeeye's hatch and THAT neuspotter's missiles. I will cast thr hatch and scratch build the missiles to be closer to what his design envisioned.
Friday, April 6, 2012
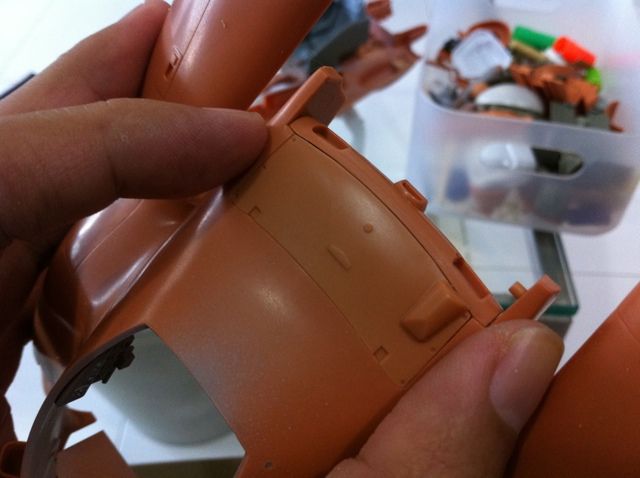
Falke 4 part 2
Based on my experience on building the Falkes, I decided to apply what I learnt.
I deepen the gap between the front piece so that even after I glue it the panel line will be evident.
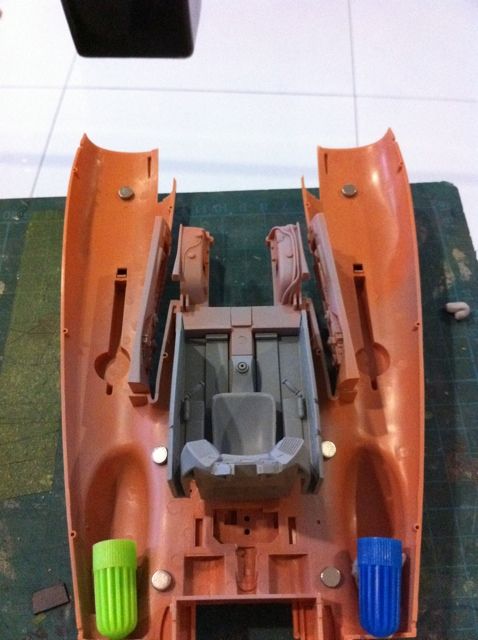
I drilled out holes and added strong magnets so that I can attach the different parts and swap them out to make different configurations.

The square holes provided the perfect place to insert the magnets. Later I will add magnetized plastic to the weapons so they can be attached. These magnetized plastic are recycled from my kid's barbie toy which uses magnets to hold the clothing and accessories.
I hollowed out the back and added color marker caps for added internal detail. They will be colored black silver.
Here's wishing all a Good Friday!
Thursday, April 5, 2012
Falke 4 - Variations
It's rainy today so no spraying for me. Moving on to the project which has long been in my to do list.
Falke 4 - variations. Basically i want to make a Falke which has lots of weapon and configuration options,
as well as some designs by Zuru jp here:
http://maschinenkrueger.com/forum/index.php?topic=3172.0
Also I will finally paint the pilot and cockpit which I have avoided so far.
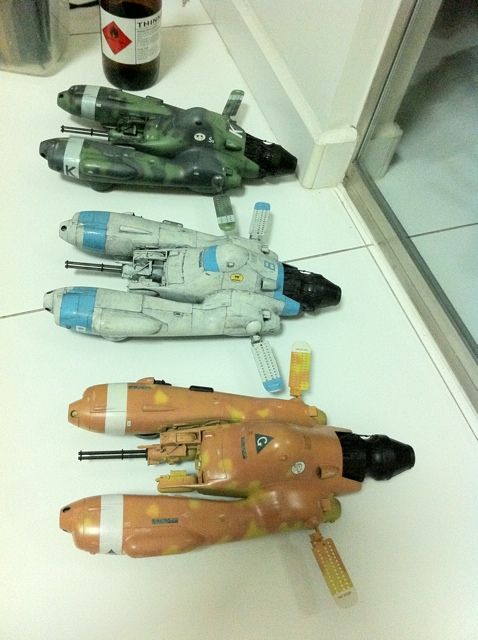
Some variants I am planning:
Stuzzo by Zuru jp
Falke bomber
Griffon
I don't plan to get the Griffon as it's still expensive and I already have 4 Falkes ...
Tuesday, April 3, 2012
Camo card folder
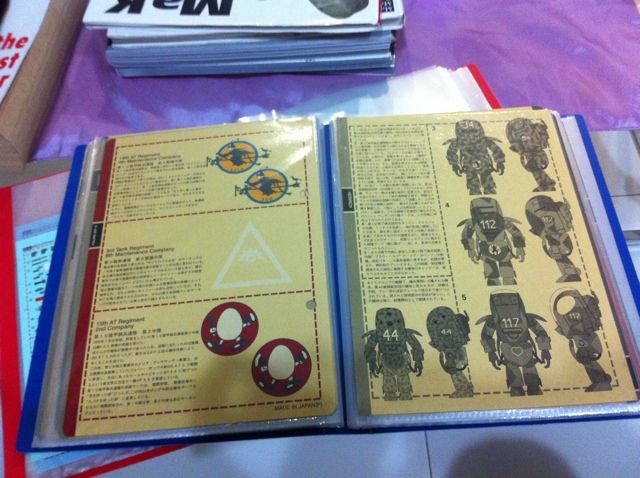
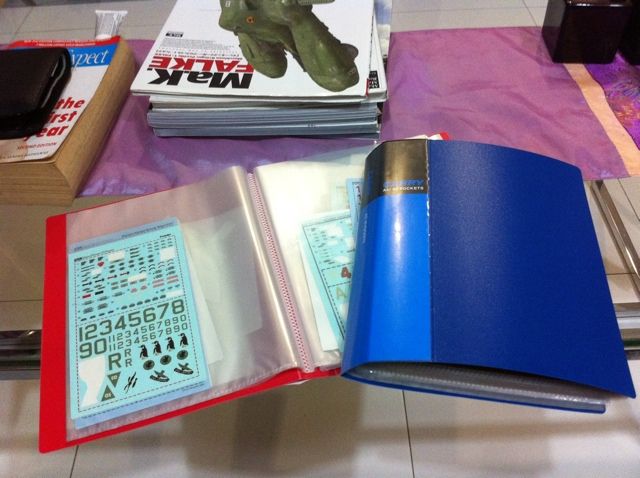
With so many camo cards and decals from the kits, how do you keep them?
Initially I just put them all in a clear file but after a while it's hard to look thru them. O even lost my favorite Land Gans camo card, the first edition!
I did not want to use ring binders as they will damage the holes punched on the cards after a while.
Then I spotted cheap $2sgd A5 folders from the local dais. That's right, $2sgd. Love them !!!
Monday, April 2, 2012
1/35 Nutrocker/Nutcracker
I finally caved in and bought myself a 1/35 Nutrocker / nutcracker.
Checked the decals and camo card and boy there are lovely schemes to build!!!
Can't find the squid rings done by max watanabe in the Mak in sf3d vol 2 though.
He must have custom printed those. Now I have a dilemma, should I build the same scheme as the 1/76 scale which will look nice together, or choose another scheme?
Decisions decisions...
I should never have bought the book, now I fell in love with many of the camo schemes!
The magic of Mak!
Sunday, April 1, 2012
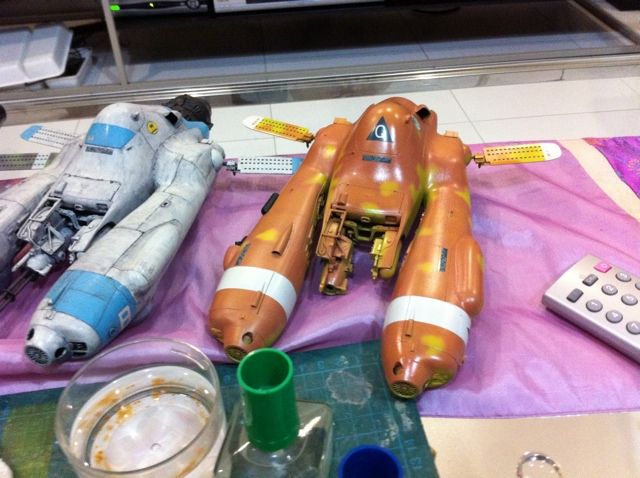
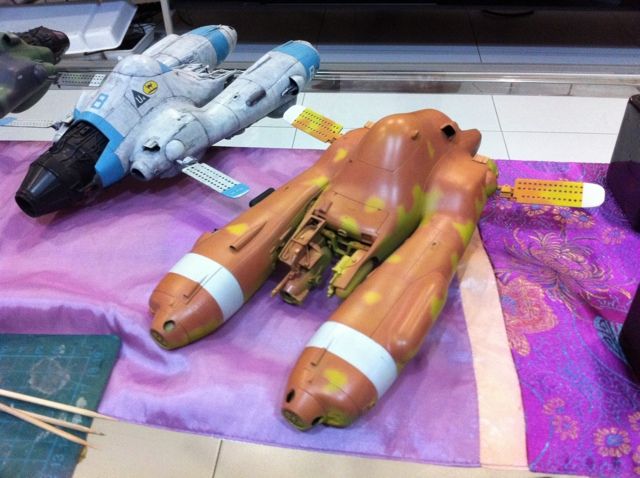
Back to the falk3 : Shit happens!
I changed to another yellow, Tamiya xf-3 flat yellow, and then onto the orange which is a custom mix of monkey rose, mr color 59 orange, mr color Gundam yellow 1.
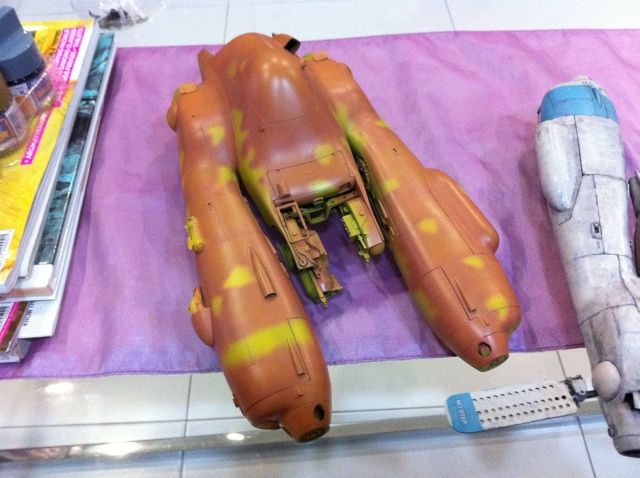
At this stage I am getting careless and not a little frustrated and lots of mistakes and accidents happened. Checked the airbrush for the amount of color left in the cup, never clean my left hand, and yellow appeared on the underside of the Falke. Huge drop of paint landed on the left side too.
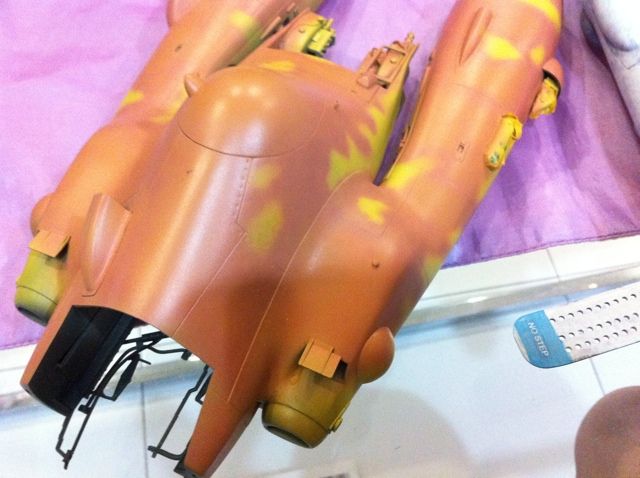
Its not very evident in the photo but it's there, right next to the nub where the antenna is supposed to be. I slowly resprayed over the mistake.
I almost gave up and wanted to strip the entire paint job. But going back to it one day later, I decided to try to finish this guy.

Masked the front and sprayed white. This took one night of work. Finally its the best part again, decals!
At this stage I am getting careless and not a little frustrated and lots of mistakes and accidents happened. Checked the airbrush for the amount of color left in the cup, never clean my left hand, and yellow appeared on the underside of the Falke. Huge drop of paint landed on the left side too.
Its not very evident in the photo but it's there, right next to the nub where the antenna is supposed to be. I slowly resprayed over the mistake.
I almost gave up and wanted to strip the entire paint job. But going back to it one day later, I decided to try to finish this guy.
Masked the front and sprayed white. This took one night of work. Finally its the best part again, decals!
Subscribe to:
Posts (Atom)