My friends over in the Mak forum suggested that I try out the squid camo scheme in the book, the one with many circles, which was in the background. initially I thought it was too tough but after much thought! I take it as a challenge to do it.
Ashley wanted it in pink too which I thought was ridiculous but then after seeing some tanks in pink, also from the pals in the Mak forum, it didn't seem crazy anymore.
Tried googling for 'pink squid' and got some funny pictures, none the least is the pink squid from Finding Nemo.
I took a photo of that squid while in the hospital with Elias as I thought he looked like it.
And so pink squid camo dedicated to my second kid, Elias, is a go!
Wait til he grows up and sees this... lol
Tuesday, January 24, 2012
Saturday, January 14, 2012
Nutrocker super detailed
Thanks guys for your well wishes! Elias is still a bit grumpy but better... Damn the apple auto correct, we did not overgraze him, but overfed him, he reached 5kg in two months instead of six!
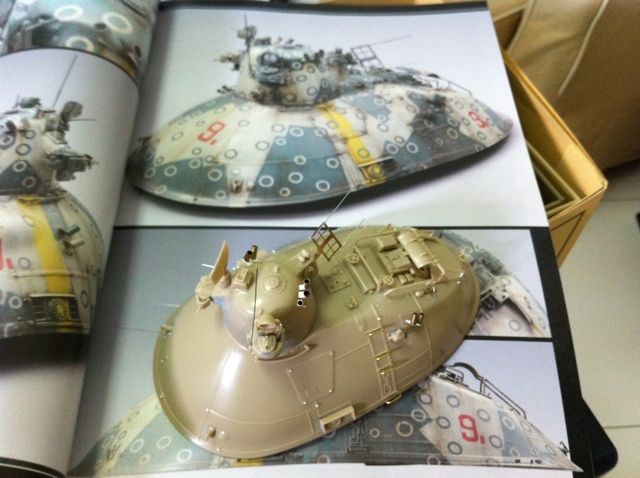
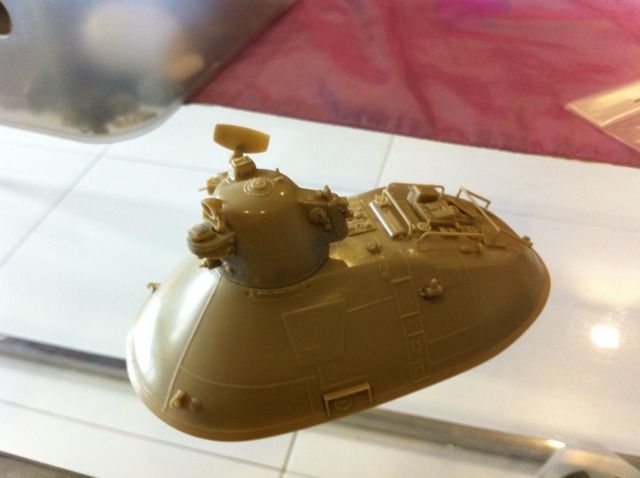
I referenced the 1/35 kit and see what other details I can put in.
I added wires for the antenna on the turret, and brass wires (no 2 brass wires from the local daiso japanese value shop) for making the handles to climb up the nut. Also removed some plastic on the left and right side which are represented by wires on the 1/35 kit.
Added smoke grenade launchers using brass tubes from hobbymate bought earlier and added rivets using very thin evergreen styrene. There are actually rivets in the kit but are very shallow and almost invisible.

Love adding details to this kit.
What do you guys think?
I referenced the 1/35 kit and see what other details I can put in.
I added wires for the antenna on the turret, and brass wires (no 2 brass wires from the local daiso japanese value shop) for making the handles to climb up the nut. Also removed some plastic on the left and right side which are represented by wires on the 1/35 kit.
Added smoke grenade launchers using brass tubes from hobbymate bought earlier and added rivets using very thin evergreen styrene. There are actually rivets in the kit but are very shallow and almost invisible.
Love adding details to this kit.
What do you guys think?
Friday, January 13, 2012
Nutrocker detailed
With my kid being sick, i cant continue painting my falke as i need to setup the spray booth. So I decided to build.
I am not a Nutrocker fan. It's design makes it fodder for rockets, not to mention lasers from the Safs.
Looking at all the entries in the Mak forum nutcracker build, as well as the Mak in sf3d vol 2 inspired me to dig out my half completed 1/76 Nutrocker which is languishing in the box.
I had previously glued and puttied it.
This kit is old and while being quite
detailed it has huge gaps which needed to be fixed with putty.
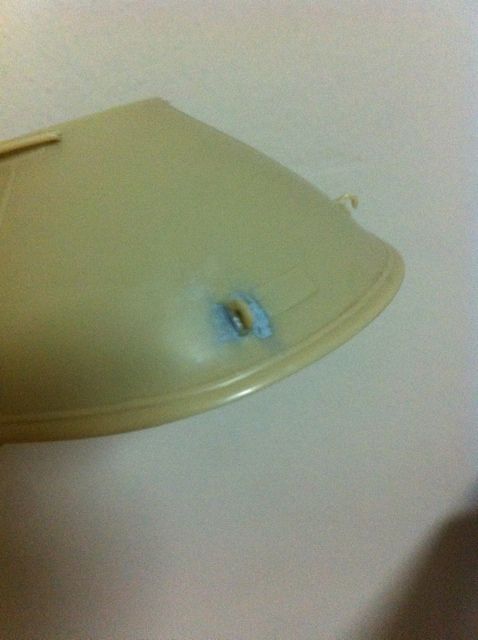
I had broken the plastic rails and fixed it with evergreen styrene.

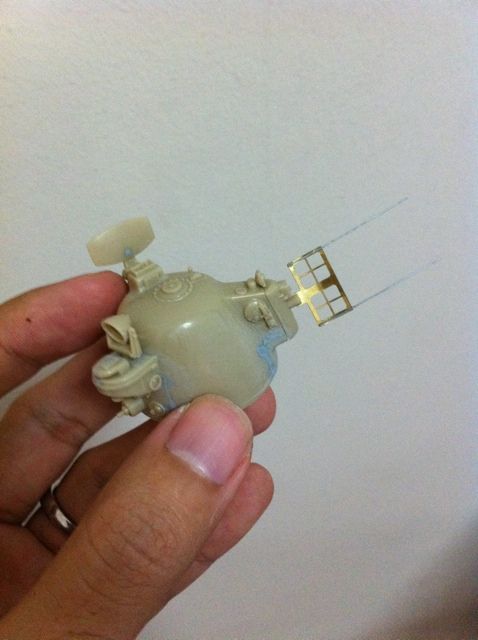
I referenced the 1/35 kits pictures and added wires to the radar thingy. I also bent the brass portion a bit like the big kit.
Falke no 3 and the trouble with Elias
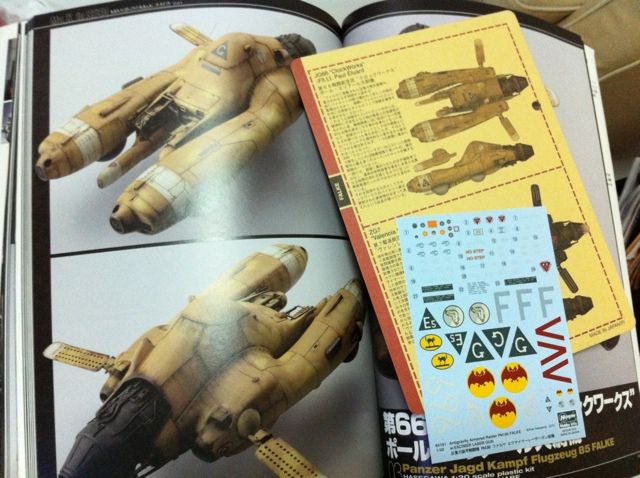
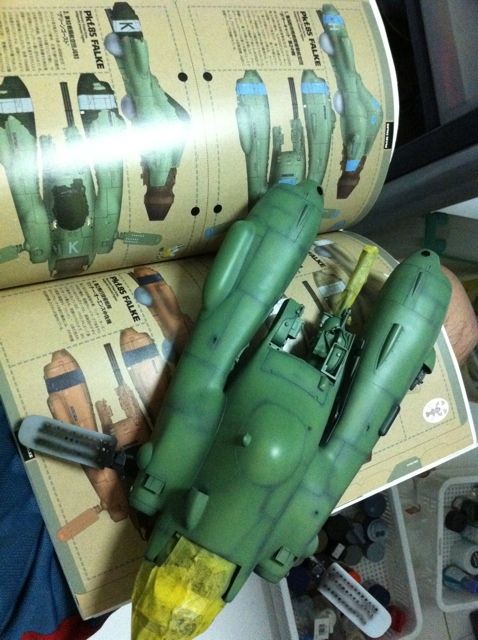
This is the clockworks scheme which I will be doing. This scheme is featured on the laser version of the Falke and is also built and painted in Mak in sf3d vol 1 by Max Watanabe.
Note that the melting clocks are inspired by the painting - The Persistence of Memory by Salvador Dali. The decals are quite nice. I read up on it and try to see if I can add more imagery from the painting. So far there's none but we shall see.
Trouble with Elias these few days and we just came back from the hospital again. He is infected with some virus that was passed down from us and has stuffy nose. Also vomiting milk regularly, imagine the entire feed puked out after feeding.
Needless to say my wife and I are extremely tired and worried. Thank God the doctor said we are unknowingly overgrazing him and helped us unblock his nose... Now need some sleep...
Tuesday, January 10, 2012
Back to the Falke
Back to the clockworks Falke, finishing up the build before I start painting, I went thru the panel lines with a pin vise(broken by accident) to deepen them. Made a few mistakes and had to putty back.
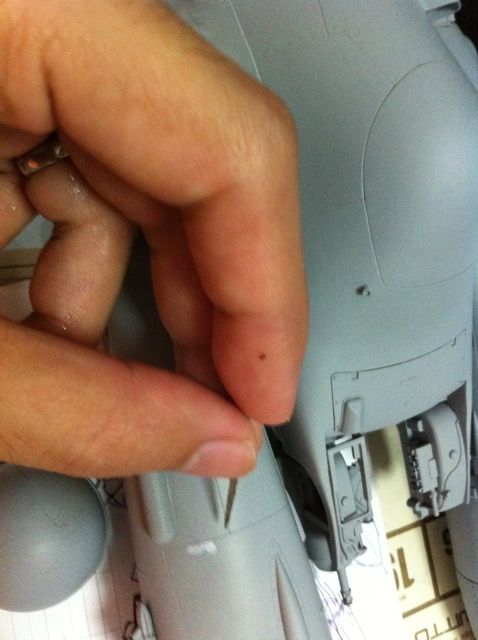
I went and drilled out the hole in the periscope on the hatch. I wondered why they did not make it a separate piece with hole...
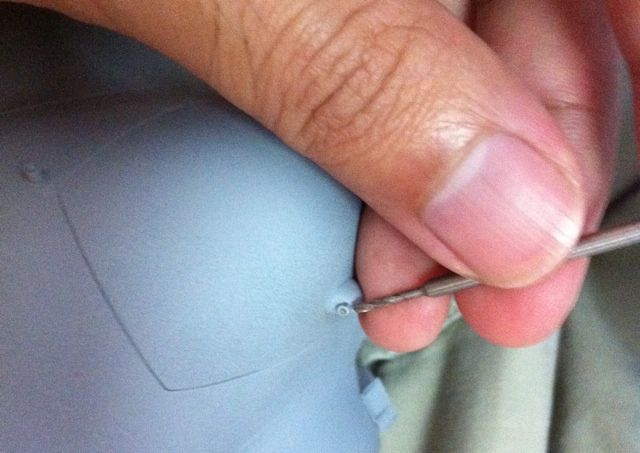
Finally I used the hobby knife and tiny drill bit to drill out the air scoops. I did this to my Falke no 2 as well.
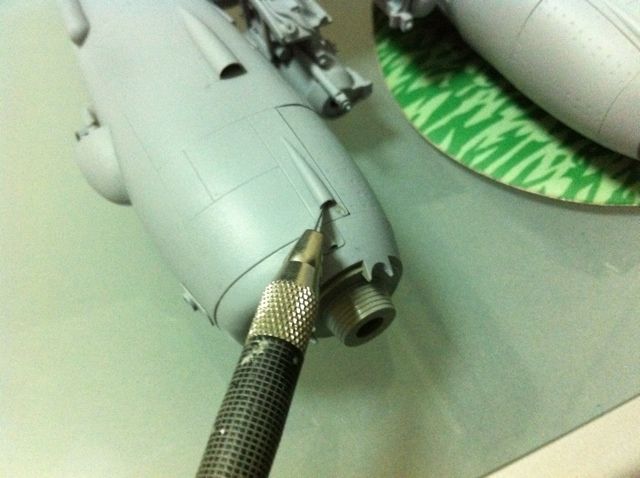
I went and drilled out the hole in the periscope on the hatch. I wondered why they did not make it a separate piece with hole...
Finally I used the hobby knife and tiny drill bit to drill out the air scoops. I did this to my Falke no 2 as well.
Monday, January 9, 2012
Baby Oskar
Stuck for over a year.
Here's where I left off with the baby Oskar ...

I reworked the skirt and primed the head. The most difficult part is the mid section which took two tries to get it to this stage.
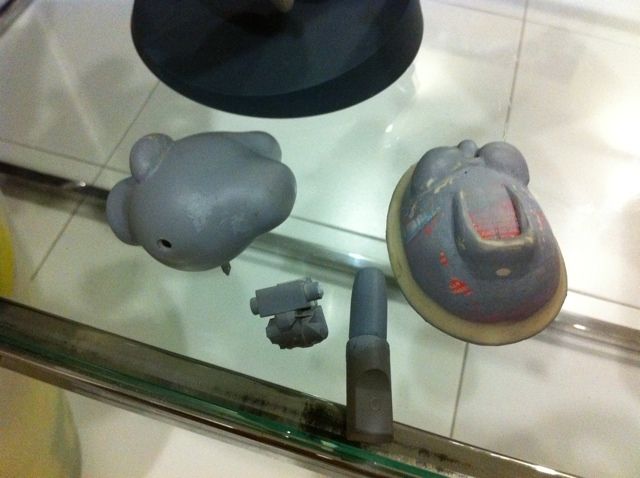
I am stuck at this stage, as I think the mid section is too high and usually in an SD design, it's almost non existent. I might need to fine tune the overall design before I continue.
Incidentally, much has changed in the way I blog. Prevously I used a compact digital camera and a netbook which was slower.
Now I take pictures with my iPhone and blog with it directly, sometimes switching to my ipad2 to edit.
The text entry on iPhone is not as good as a real keyboard but the ease of blogging is really good.
Here's where I left off with the baby Oskar ...
I reworked the skirt and primed the head. The most difficult part is the mid section which took two tries to get it to this stage.
I am stuck at this stage, as I think the mid section is too high and usually in an SD design, it's almost non existent. I might need to fine tune the overall design before I continue.
Incidentally, much has changed in the way I blog. Prevously I used a compact digital camera and a netbook which was slower.
Now I take pictures with my iPhone and blog with it directly, sometimes switching to my ipad2 to edit.
The text entry on iPhone is not as good as a real keyboard but the ease of blogging is really good.
Falke no 3 part 4 primed

Baby Elias has been cooperative tonight and so I managed to clean up some parts and prime it. I think it's a bit on the thin side so will probably hit it with a bit more primer before I start to paint it.
Saturday, January 7, 2012
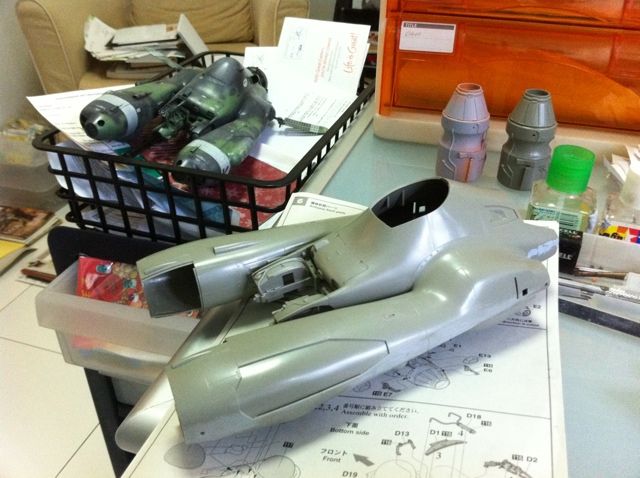
Falke no 3 part 3
Continuing,I used Pla plate to reconstruct the part which I filed off.

Here's the front part.
Here's the rear part.

These are the separate parts which will be glued after painting , the mini gun, main thruster and two attachments which link the thruster to the fuselage.
Here's the front part.
Here's the rear part.
These are the separate parts which will be glued after painting , the mini gun, main thruster and two attachments which link the thruster to the fuselage.
Thursday, January 5, 2012
Falke no 3 part 2
Almost complete it the second day...
Speed does not mean drop in quality, as I puttied and sanded all the necessary parts.
The most troublesome bit is the side of the cockpit where I had to go in with a needle file to fix the seamlines.
Having learnt my lesson when painting Falke no 2, I decided not to attach the two anti gravity shields and main thruster first, only after the paint job.
all these work done between bottle feeding my kid and trying to get him to sleep..
Falke no. 3 - Clockworks
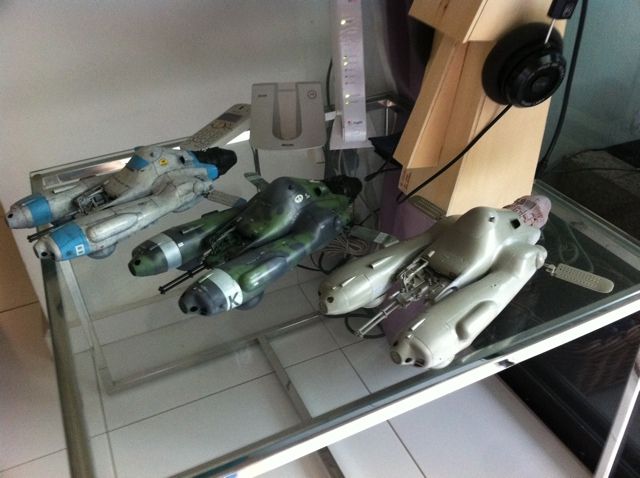
Encouraged by almost completing Falke no 2, I decided to start on no3.
This will be a fast build, no cockpit details to fix and will be yellow orange scheme : clockworks from the camo card.
Progress after a few hours. I filed off the side thruster details as per max watanabe tip to reconstruct it with plaplate.
This will be a fast build, no cockpit details to fix and will be yellow orange scheme : clockworks from the camo card.
Progress after a few hours. I filed off the side thruster details as per max watanabe tip to reconstruct it with plaplate.
Tuesday, January 3, 2012
Falke no 2 part 3
Choosing a scheme for the Falkewas difficult as many of them from the camo cards and Falke modeling book are very nice. And I wanted to try out all the decals. Now I understand why people buy so many planes of the same model.
I wanted the a green camo scheme which does not break up the shape pd the plane too much as i wanted the shape of the plane to be preserved.
I started with the base coat. Learning from the color modulation book introduced to me by maxwinamp, I sprayed three variations of green on the kit. The darkest in the under side and shadow areas, plain green on the middle area and white with green on the highlights.
Second color which was violet grey, same thing, three variations done using free hand. I wanted a feathery outline but seems I need to work on my airbrushing skills as the blurring was too much. I work with very dilute paint with 5psi.
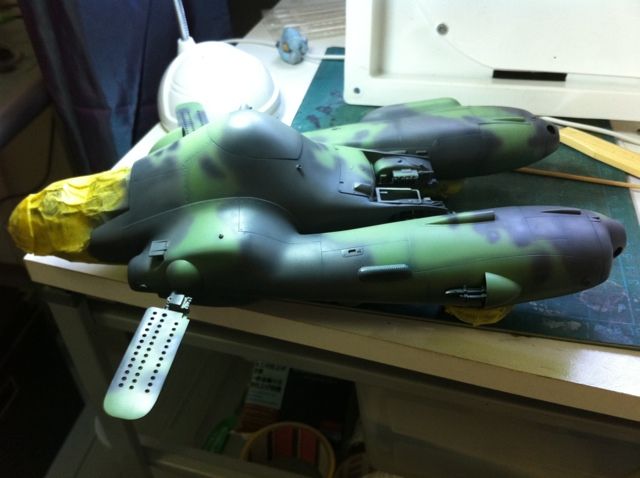
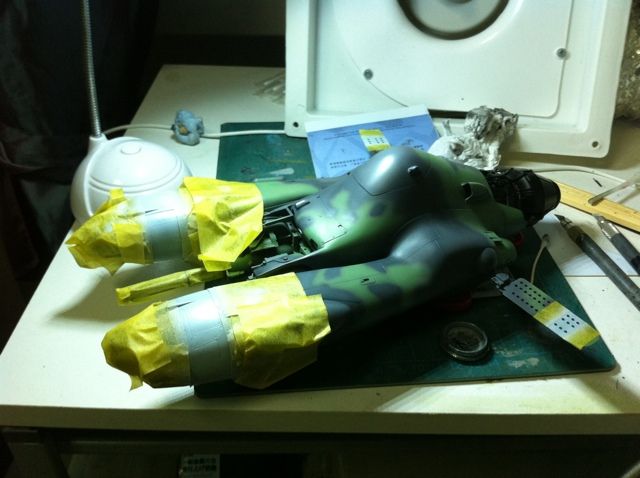
Masked off the front portion and sprayed white. This was harder than expected as one side had the radar bump.
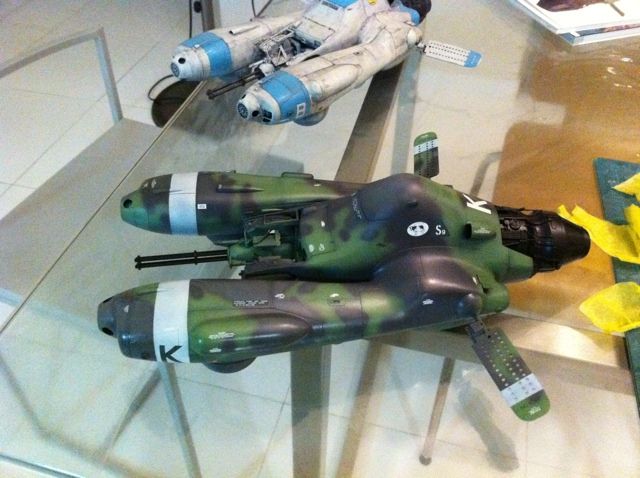
This is the model I wanted to achieve from the Falke Mak book.
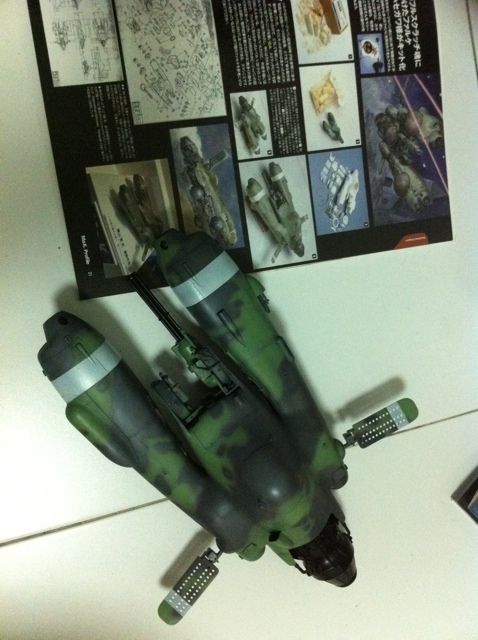
I loved the holy cow (reference to kow Yokohama) so I used it together with some other decals.
I wanted the a green camo scheme which does not break up the shape pd the plane too much as i wanted the shape of the plane to be preserved.
I started with the base coat. Learning from the color modulation book introduced to me by maxwinamp, I sprayed three variations of green on the kit. The darkest in the under side and shadow areas, plain green on the middle area and white with green on the highlights.
Second color which was violet grey, same thing, three variations done using free hand. I wanted a feathery outline but seems I need to work on my airbrushing skills as the blurring was too much. I work with very dilute paint with 5psi.
Masked off the front portion and sprayed white. This was harder than expected as one side had the radar bump.
This is the model I wanted to achieve from the Falke Mak book.
I loved the holy cow (reference to kow Yokohama) so I used it together with some other decals.
Subscribe to:
Posts (Atom)